Lacing up your Cloud shoes properly can make a significant difference in both comfort and style. Cloud shoes are known for their innovative design, offering a unique blend of performance and fashion.
Whether you’re a seasoned athlete or a fashion-forward individual, this comprehensive guide will walk you through the process of lacing on Cloud shoes to maximize your experience.
Getting Started with Your Cloud Shoes
Before you dive into lacing your Cloud shoes, ensure you have the right pair that fits you well. Proper fit is the foundation of comfort and support in any footwear. Make sure the shoe length and width match your feet, allowing enough space for your toes to move freely.
The Classic Criss-Cross Lacing
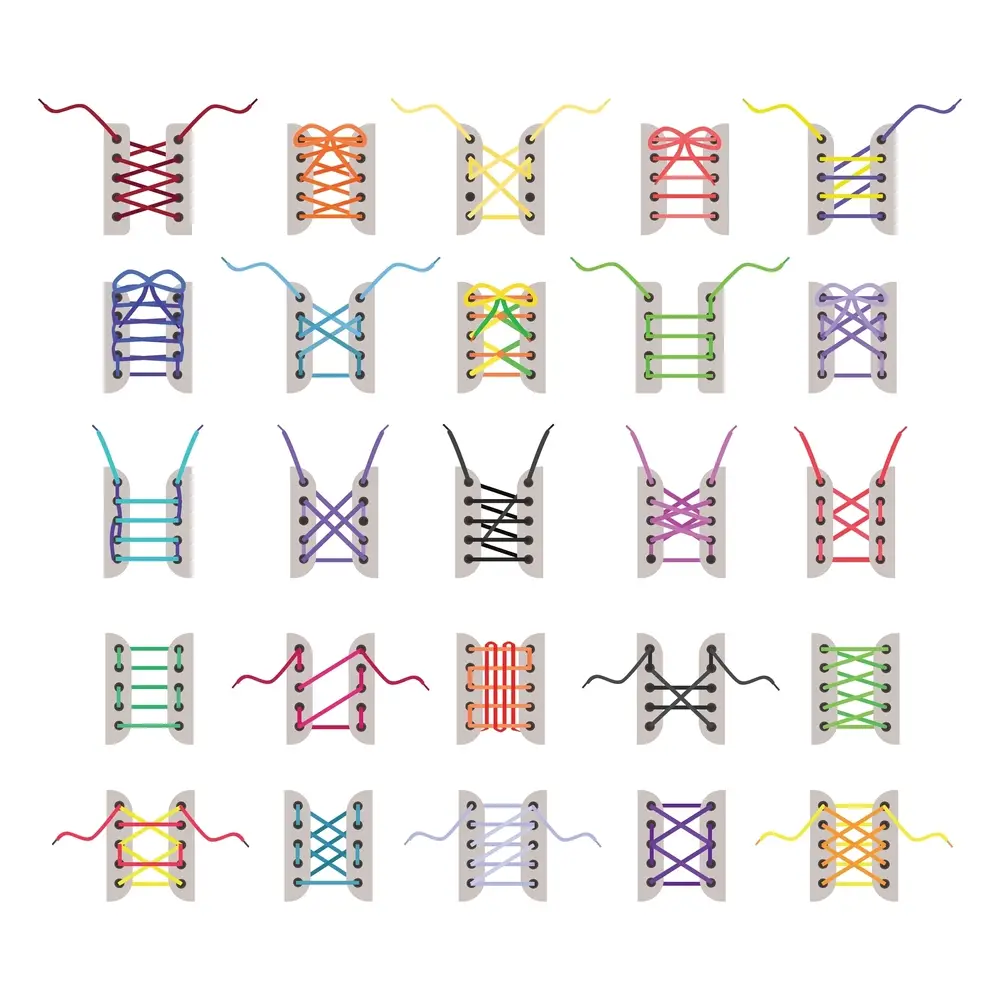
The classic criss-cross lacing technique is perfect for most casual situations. It’s easy to adjust and offers a balanced fit. Here’s how to do it:
Step 1: Begin by inserting the lace into the bottom eyelets from the outside, ensuring equal lengths on both sides.
Step 2: Cross the left lace over to the right side and insert it into the next higher eyelet on the opposite side.
Step 3: Repeat the process with the right lace, crossing it over to the left side and inserting it into the next eyelet.
Step 4: Continue alternating sides until you reach the top eyelets.
Step 5: Tie a secure bow at the top, and you’re good to go.
The Secure Heel Lock
If you’re aiming for extra stability and support, the secure heel lock technique is ideal:
Step 1: Lace your Cloud shoes using the classic criss-cross method until you reach the second-to-last set of eyelets.
Step 2: Instead of crossing the laces, thread them straight up through the last eyelets on each side.
Step 3: Cross the laces over the tongue and insert them into the loops created by the straight laces.
Step 4: Pull the laces tight to lock the heel in place.
Step 5: Complete the lacing with a bow as usual.
The Wide Forefoot Lacing
If you have a wider forefoot, this lacing technique can provide more room and comfort:
Step 1: Begin lacing your Cloud shoes using the classic criss-cross method until you reach the middle eyelets.
Step 2: From the middle eyelets up, use only one lace on each side.
Step 3: Thread the lace straight up through each successive eyelet, skipping one eyelet between each lace.
Step 4: Tie a secure bow at the top to secure the lacing.
The Fashionable Straight Bar Lacing
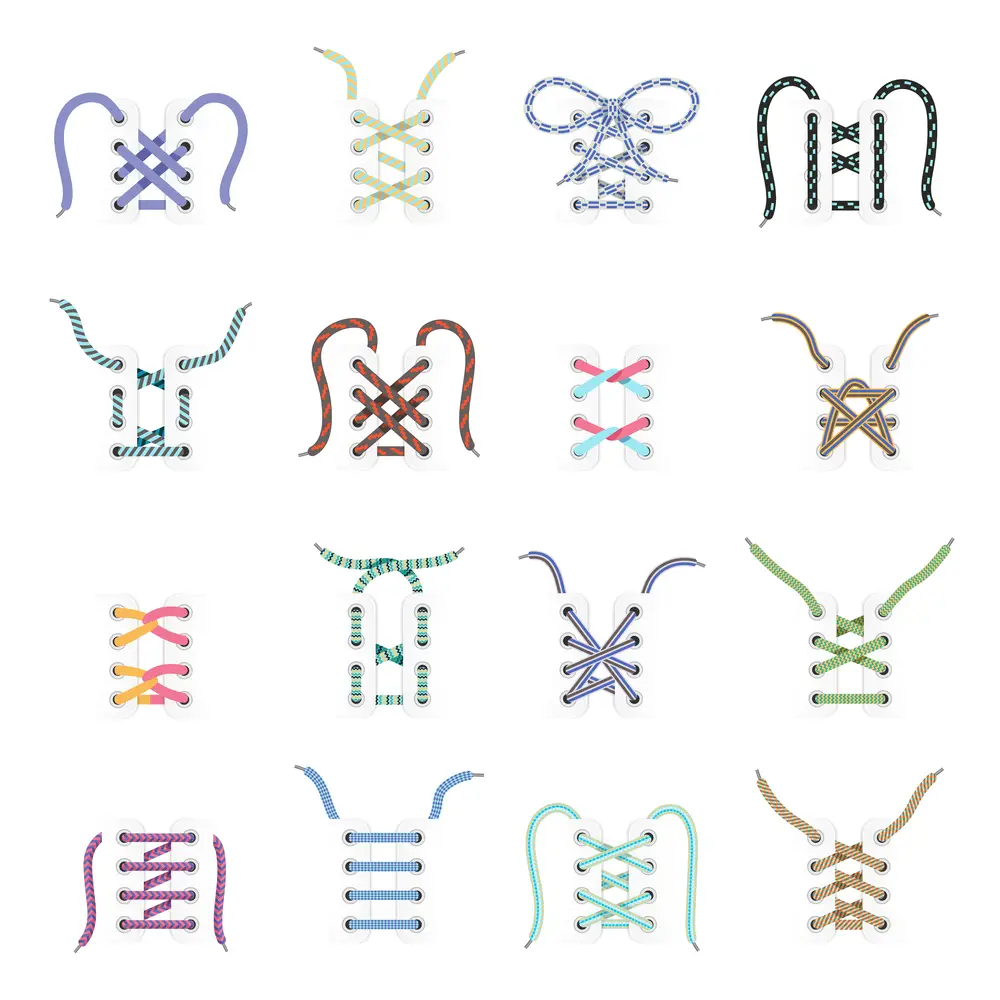
For a unique and stylish look, try the straight bar lacing technique:
Step 1: Insert the lace into the bottom eyelets from the outside, leaving equal lengths on both sides.
Step 2: Thread both ends straight up on the same side, creating a parallel bar-like appearance.
Step 3: Continue threading the lace through the eyelets, maintaining the parallel pattern.
Step 4: Tie a bow at the top to secure the lacing.
Achieving Precision with the Loop Back Lacing
The loop-back lacing technique offers precision fit for individuals with specific foot shape needs:
Step 1: Begin by inserting the lace into the bottom eyelets, leaving equal lengths on both sides.
Step 2: Cross the left lace over to the right side and thread it through the second eyelet on the same side.
Step 3: Repeat the process on the other side, crossing the right lace over to the left and threading it through the second eyelet.
Step 4: Continue alternating sides, skipping one eyelet each time.
Step 5: Tie a bow at the top to secure the lacing.
The Quick Tuck Lacing for Slip-On Convenience
The quick tuck lacing method is perfect for turning your Cloud shoes into stylish slip-ons:
Step 1: Lace up your Cloud shoes using the classic criss-cross method, leaving the top two eyelets empty.
Step 2: Tuck the ends of the laces into the shoe, so they don’t dangle.
Step 3: Enjoy the convenience of slipping your shoes on and off effortlessly.
Achieving a Custom Fit with the Hidden Knot Lacing
If you’re looking for a clean and custom appearance, the hidden knot lacing technique is the way to go:
Step 1: Lace up your Cloud shoes using the classic criss-cross method, leaving some extra lace length at the end.
Step 2: Tie a knot with the two lace ends to create a loop.
Step 3: Tuck the loop under the laces and pull it tight to secure the knot inside the shoe.
Step 4: Enjoy a streamlined look with no visible knots.
Conclusion:
Lacing on Cloud shoes is not just about functionality; it’s an opportunity to enhance your style and comfort. By following the various lacing techniques mentioned above, you can achieve the perfect fit and look for any occasion. Experiment, find your favorite style, and enjoy the exceptional combination of performance and fashion that Cloud shoes offer.
Frequently Asked Questions
Are there specific lacing techniques for different foot types?
Yes, certain lacing techniques can cater to specific foot shape needs. Techniques like the wide forefoot lacing or the loop back lacing are designed to accommodate wider or narrower feet.
Can I use the same lacing method for all types of Cloud shoes?
Absolutely! While some techniques might be more suitable for certain situations, you can experiment with different lacing methods to find what works best for you in various contexts.
How do I clean my Cloud shoes after lacing them up?
Cleaning your Cloud shoes after lacing them up is essential to maintain their appearance. Follow the manufacturer’s guidelines for cleaning and care to ensure their longevity.
Can I combine different lacing techniques for a unique look?
Certainly! Feel free to mix and match lacing techniques to create a personalized and distinctive style that suits your preferences.


![How To Clean Mud Off Leather Shoes? [Easy Steps]](/uploads/how-to-clean-mud-off-leather-shoes.jpg)
![How To Make Shoes Slip Resistant? [Different Ways]](/uploads/how-to-make-shoes-slip-resistant.jpg)